Showing posts with label burlap. Show all posts

Monday, February 10, 2014

Surprise Burlap Banner ~ Silhouette Challenge

Hello Friends!

I have another project to show, and of course, I'm sharing the file too!

I ran across this project, and used my Silhouette to make a similar one for myself!


The how-to's are in the file, which I have for you to download free! 

But before you go to the download, I decided to take it a step further...

I love decorating a bit for each holiday, but honestly, in the middle of tax season, I'm just too busy to spend very much time at it...so flip the banner over for the surprise!

I thought that a banner I could use for both Valentine's Day and St. Patrick's Day would be great, so I made it reversible!
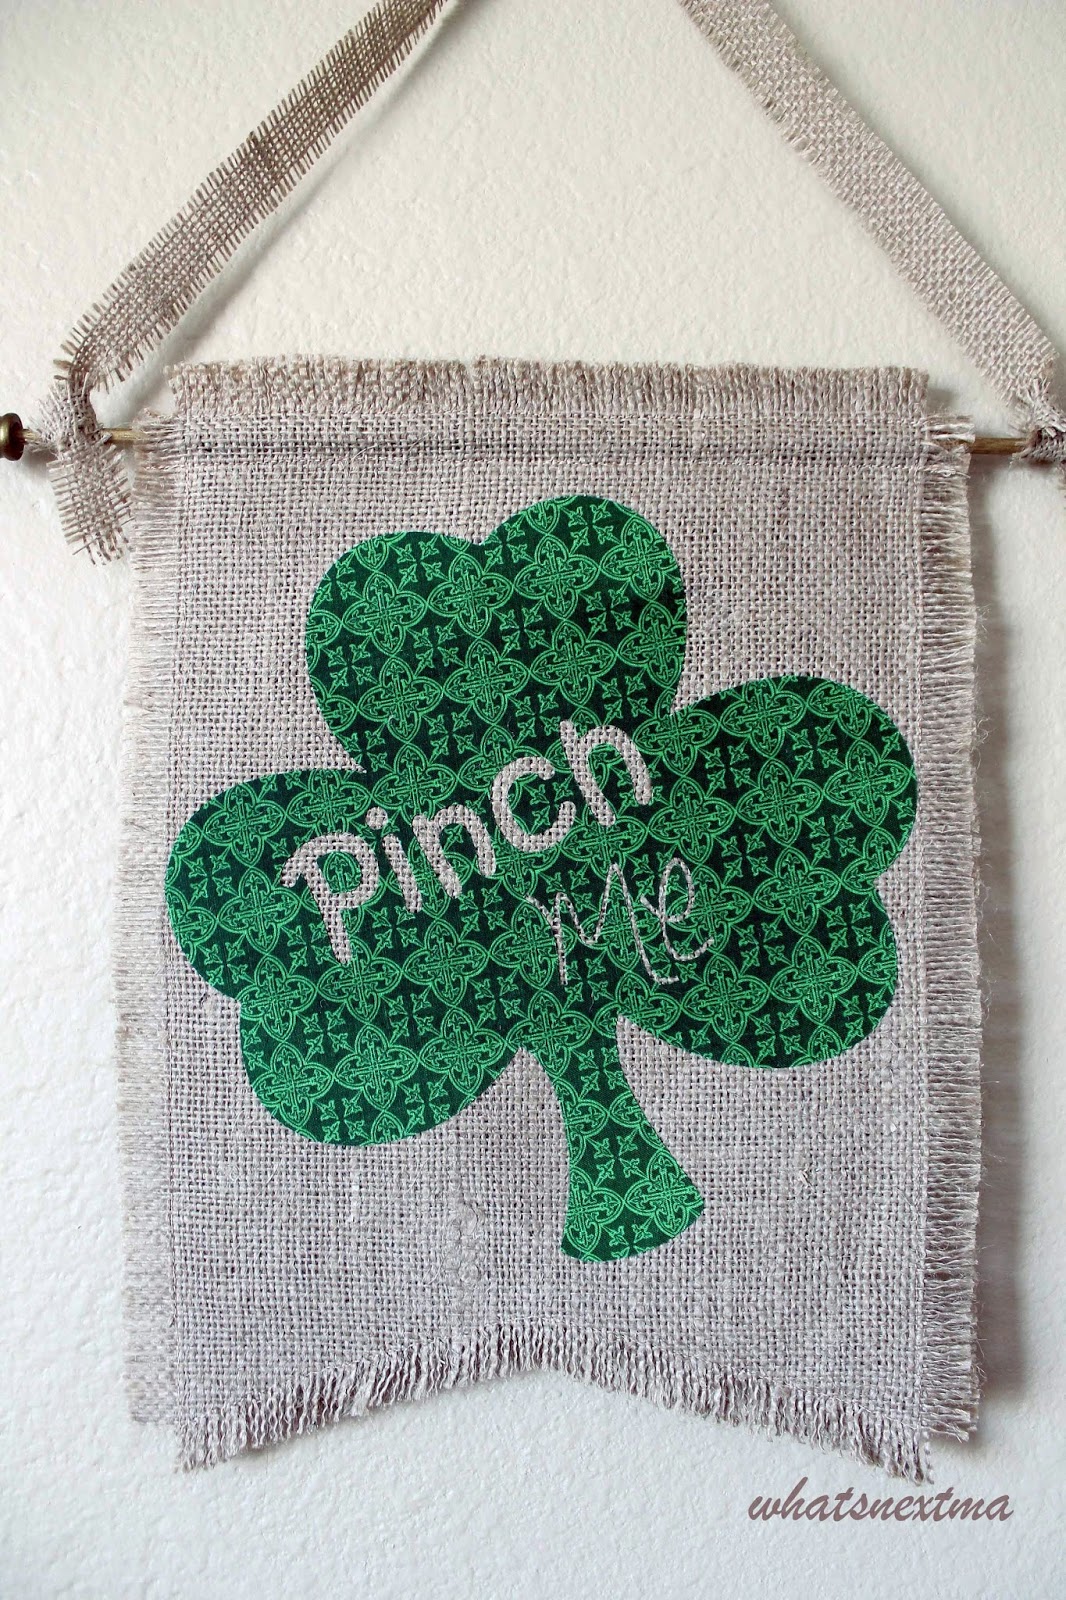


The assembly is pretty simple, and adaptable to your skill level. I've included how I made mine in the download, so I won't bore you with the details here.

Surprise Burlap Banner

Free File Etiquette: You may use this file to make physical projects to keep, give away, or sell. Please do not share the file itself, direct others to this page to download for themselves. Thank you!

I will however, share a quick tip for cutting burlap - you might already know it, but if you don't it will save you much frustration while cutting!

The problem that I have with cutting burlap is getting a strait line...even if I flatten the fabric and cut carefully, it is so slippery, that I end up with jagged edges, no fun!

So, here's the tip: decide where you want to cut, then pull out one thread of burlap all the way from side to side.


Now you have a 'space' that you can follow with your scissors, to cut a strait line in the burlap!


I hope you enjoyed my project, and encourage you to go create!

I'm joining forces with some online friends today, as a part of the Silhouette Challenge group.


Today's challenge is all about fabric - so if you like fabric, and love inspiration, come join the party!
  1. No-Sew Valentine's Day Pillows by A Tossed Salad Life
  2. No-Sew Interchangeable Fabric Bunting by unOriginal Mom
  3. Monogrammed Burlap Garden Flag by The Turquoise Home
  4. Crawl, Walk, Bike by It's Always Craft Time
  5. Freezer Paper Stenciled Tote Bags by Weekend Craft
  6. DIY Bleach Spray Shirt by Practically Functional
  7. Stenciling Sherlock by Please Excuse My Craftermath...
  8. Felt Star Wands by Cutesy Crafts
  9. Yoda Kid's T-Shirt by Architecture of a Mom
  10. Mark Your Territory- Dog Flags by Black and White Obsession
  11. Nautical Pillows by Lil' Mrs. Tori
  12. Big Sister Gift & Silhouette Cut File by Creative Ramblings
  13. Nerdy Baby Onesies + Free Cut File by Essentially Eclectic
  14. Easy Easter Bunny Onesie - Silhouette Cameo Craft by Adventures in All Things Food & Family
  15. Fabric Envelopes for LEARNING LETTERS! (& cut file) by From Wine to Whine
  16. "Good Morning, Sunshine!" Memo Board by Tried & True
  17. Hearts-A-Lot Burlap Pillow Cover by My Paper Craze
  18. Baby Quilt by Dragonfly & Lily Pads
  19. Surprise Holiday Banner by Whats Next Ma
  20. "Team Betty" Tote Bag by The Thinking Closet
  21. DIY Sock Minion by Create it. Go!
  22. Pretty Up Some Organza Bags by Getsilvered
  23. Easy Heart Appliqued Onsies by Create & Babble
  24. Bleach Pen Gel & Freezer Paper Stencils Made with the Silhouette Machine by Bringing Creativity 2 Life
  25. Valentines Baby Onesie & Boy's Shirt + Free Cut Files by The Frill of Life
  26. Valentine's OWL Always Love You T-shirt by My Favorite Finds
  27. DIY Screen Printed Curtains by Chicken Scratch NY
  28. Fabric Painted Quilted Wall Hanging by Terri Johnson Creates
  29. Glitter Iron-On Top by Simply Kelly Designs
  30. DIY Monogrammed T-shirts with Silhouette Heat Transfer Material by Pitter and Glink
  31. Birthday Challenge by Fadville
  32. Machine Applique with SIlhouette Cameo by The Sensory Emporium
  33. Fabric Applique Valentine's Day T-Shirt by DailyDwelling
  34. "Cute as Cupid" shirt by crafts, cakes, and cats
  35. Sew Cute Applique by Life After Laundry
  36. Rhino Onesie by It Happens in a Blink
  37. Upcycled Birchbox Cameo Accesory Organizer by Cupcakes&Crowbars
  38. Customizing textiles with Heat Transfer Vinyl (working title) by feto soap
  39. Easy Fabric Art by McCall Manor
  40. Lady Bug Tote Bag with Silhouette Rhinestones by Ginger Snap Crafts
  41. Mommy and Em's Coordinated Aprons by TitiCrafty
  42. Canvas sketch project and a share by Clever Someday
  43. Foxy Lady Pajamas by Mabey She Made It
  44. Teddy Bear by Work in Progress
Thanks for stopping by,

Meredith

Sunday, April 3, 2011

I Got Crafty: Burlap Dry Erase Board


Well, I decided to have a bit of fun in the craft cave again...I should do this more often, since it ends with something nice for my home!

It started with the kitchen renovations...that story is on the other blog...here..., and no, we're not done yet...but soon, very soon...

Anyway, now that I actually have a PANTRY in my kitchen ... yeah! ... I have this great view from the dining room table ...

Photobucket

Well...that could use a bit of something, couldn't it?

I was sure that I had the perfect idea...here is how the conversation went...(sort of...)

Me: Hey hon, wanna hear my great idea to put here?

Dh: Sure, whatcha want to do?

Me: I'm going to get an old kitchen cabinet door, then I'm going to paint the outside green like the kitchen walls, then paint the inside part with chalkboard paint...and we can have a chalkboard for our kitchen! Won't it be great?

Dh: Chalkboard? Why chalkboard? That sounds dark. I like whiteboards better, they're so much easier to use...could we just hang a dry erase board there?

Me: (dumbfounded look...) Dry erase??? Why would I want a big ugly whiteboard there?

So...enter blogland...(Thank you, blogland!!!) In one of the fabulous linky parties out there I ran across this tutorial from Get Your Craft On, and inspiration struck!

I decided to try my hand at a tutorial-type post...so bear with me...

Gather your supplies:

Frame with glass
burlap (or fabric, or paper...whatever you want)
masking tape

I pulled out a frame from the back closet, I bought this one at Kohl's on sale...

Photobucket

I'm not even going to come close to admitting how long ago I purchased this...

Then pulled out the burlap, (come on, you know you have some sitting at home, ready for a project....don't you?, don't you?)

And cut a piece to extend around the cardboard backing of the frame.

Photobucket

I got out the extremely specialized tool then...the masking tape...and stretched the burlap around the cardboard, taping it in place to hold it down.

Now, I didn't take pictures of the in between step...but now would be a good time to clean the glass really well...before you reassemble the frame...

Photobucket

I did miter the corners (sloppily though) to cut down on the bulk...but as you can see, this is not a fancy job...hey, its the back...if I hadn't taken pictures, no one but me would ever have seen!

Put your glass back in the frame, put your burlap covered backing in....and flip it over to see your fabulous new dry erase board!!!

Photobucket

Hmm...........that's.............uhh..........well............underwhelming...............is the word that comes to mind...hmm...........

Well....now what do I do? I could cut some vinyl...or use a stencil and paint a design...or cut some fabric....or, I could take a look around what is currently my crafting passion and so is readily accessible in my craft room....stamping!

So, how about a few more supplies:

rubber stamps ( I used a fabulous one from Unity Stamp Co)
dye ink (I used Tuxedo black by Memento)
ribbon, whatever you've got that looks good with your project

After experimenting for a bit with some spare burlap I decided on a border look, rotating and repeating the stamp across the top and bottom...with the ribbon as an accent.

So let's take a look now, shall we?

Photobucket

Photobucket

Much better, yes? I left a lot of blank space...as the intention is really to use this as a memo board...but you can get as creative as you would like to to suit your project!

One last thing...the dry erase marker...I know that I could just let it sit on top of the frame...or tie it on with a ribbon...or even attach it with some velcro...my children are old enough that having the marker easily accessible is not a problem...but I didn't want to have it out...its not exactly pretty, you know?

Photobucket

So I tucked it away inside the cabinet door using some self-stick velcro...see? Nice and handy, but out of sight...good!

Here are the before and after views...

Before:

Photobucket

And now:

Photobucket

please try very hard to ignore the pile of dirty dishes in the sink...and on the counter...I had to take the pictures while I remembered to during the daytime...be nice!

...not exactly Ballard Designs...but better than nothing!

Thanks for reading! I hope you enjoyed my little tutorial!

I'm linking this post up over at Funky Junk Interiors Burlap Theme Linky and the Tatertots and Jello Weekend Wrap Up Party.


Meredith