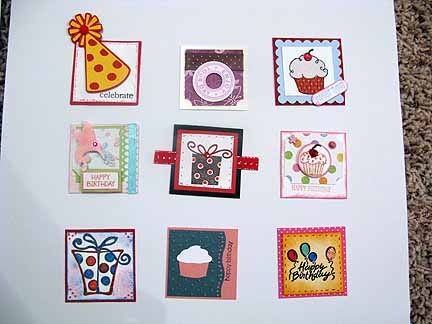
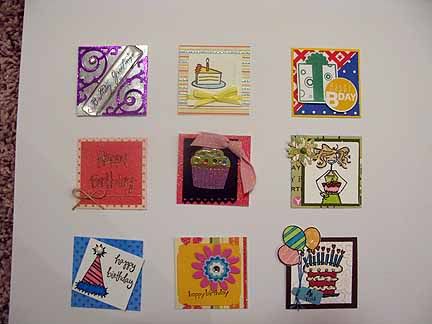
The swap was for birthday twinchies, so that I could have the beginnings of the million or so birthday cards that it seems I need each season. So after a successful swap, with fabulous twinchies like you see below overflowing my stash...


...how many cards do you think I have made with them? That's right...none! It seems that for me, coordinating my 'style' with someone else's is a little more difficult in practice than in theory...hmm.
So, determined to use these fabulous little gems to make equally great cards, I broke into the stash and started creating...and here are the results!

Terrie added the cutest little pom pom to her birthday hat...and with this card, I figured out the best ever glue to keep my bows on! Scotch Quick Dry Adhesive, comes in a bottle, and since it is a wet glue, takes a bit to dry...but once it does, that puppy is stuck! Fabulous!

I had fun with my Martha Stewart punch carrying on the 'dots' from the party hat.

This one I was so pleased with that I took a picture before the glue holding on the buttons was dry! It does dry clear, just so you know. And though it is difficult to capture in pictures, the background for this card is white glitter paper...all over glitter!

Really, this and several of the twinchies in the swap could be used for more than just birthday cards...but I decided to stick with birthdays because those really are the cards that I need most!

In case you were wondering, this is how I am signing the back of the cards...to give credit to the twinchie designers too...that is, if they signed them!

This is one of the twinchies that wasn't signed (sadness!), but the designer actually sent me (as the hostess) extra twinchies...and even extra punched cupcakes! I had enough to make three cards!

I changed the twinchie a bit by popping up the cupcake top, then used the extra cupcakes to border the bottom...I wanted to bring in some black because of the sentiment and think that the narrow ribbon adds just the right graphic accent...what do you think?

I had enough cupcake punches to add to the inside too.

This twinchie is actually mine...I was going for graphic and bright...with the intention of using them on cards for younger boys.

And on a side note...I finally got the die for the Happy Birthday sentiment to work! It took several experiments with shims and papers until I got the right combination...whew!

This twinchie is by Rainy B. I was surprised at how difficult this twinchie was to use on a card! You wouldn't think that black, white and red would be difficult to use, would you? I actually tried several combinations, and ended up using this fabulous black glitter paper...although you can't see it in my pictures, the glitter actually reflects in multiple colors, catching the red highlights fabulously!

I added hot-fix gems (love my i-rock!) to the tag and the lower left of the card...I'm thinking on coloring them red, to match the gem on the present...but I have to purchase a red alcohol marker to do it...maybe later this week...

And to tie in the inside of the card with the twinchie, I used the same pattern of doodling around the edge...black marker dots with silver glitter dots in the corners. (Although I didn't take a good enough picture for you to see the silver glitter clearly.)
This last card qualifies for a challenge over at the Do You Stack Up challenge blog, #19 Add a Tag. They have the neatest challenges over there, you should play along! I'm glad that I'm able to play along again...its been a while!
Do you have swap stashes too? Hopefully this post will inspire you to dig them out and start creating! It was a stretch to incorporate someone else's style into my cardmaking...but a good one!
That's all for today! Hopefully I'll have time and creative inspiration to use up some more of these fabulous twinchies soon, then I guess I'd have to host another swap!
Enjoy,
Meredith
