So I picked up this pad of coordinating paper a bit ago...some lovely designs by Amy Butler, published by K&Company, that I thought have the loveliest color combinations. The papers are all shades of gray, green, blue, ivory and the tiniest bit of pink. The designs are mostly graphic, with strong lines and bold forms...truly striking.
My dilema came when I needed to choose a project to use these papers...what to do? I had seen projects around the web that ranged from simply framing them under glass (they are lovely enough) to various card projects...none of which appealed to me.
I finally decided to make a mini album, one just for me, full of ink and stamps and lovely colors, one designed to make me smile every time I flip through it...so I did.
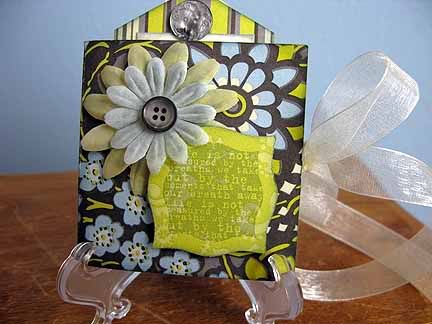
I chose to make a 3" x 3" meandering maze album, it is a type of album that you make the pages from just one sheet of 12" x 12" paper...so clever! I used a combination of the instructions from a few different sites, just google meandering maze album and take a look, there are several great tutorials out there.
I love the look of distressing things, so I gave my sponges a workout inking all the edges of the pages and layers...
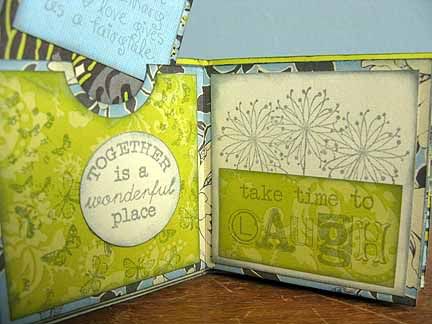
All the stamps I used are from Unity Stamp Company, from various Kit of the Month's...they do such a clever job of making the phrases look unique! I chose the phrases that make me happy!
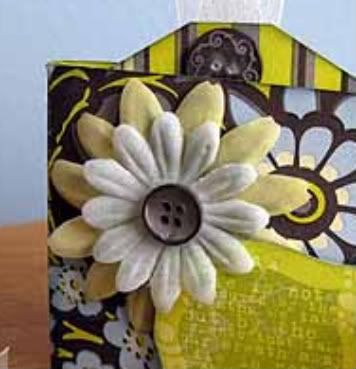
The flowers I wanted to use were too bright and new from the package, so they got the ink treatmant too...it gave them the perfect gray tint to coordinate with the paper.
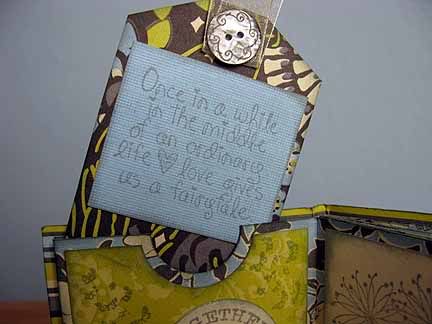
I pulled buttons and ribbons from my stash, and had fun choosing layers and shapes to add to the album to make it shabby enough to make me smile...
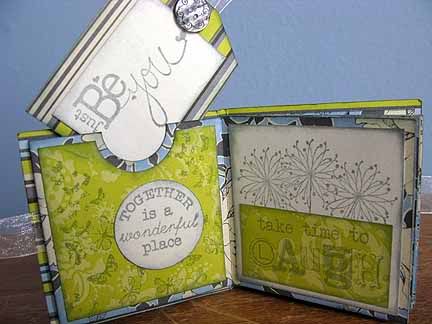
When you make the album, because of the way you fold the 12" x 12" paper, you have the option to include some pockets...I included four in my album, so that I could insert tags and include even more quotes that make me happy.
I love how it turned out, and look forward to finding more fabulous sentiment stamps that make me happy, so that I can fill up the pages!
This album was made to fit two challenges, The Gray is the New Black Challenge over at Moxie Fab World, and the No Stress, Distress! challenge over at the Do You Stack Up? challenge blog. You should play along too!
Enjoy,
Meredith
A space for me to explore my latest interests, a bit about family, a bit about work, a bit about crafting. My current favorite activity is quiltmaking, all the beautiful fabrics!
Monday, January 17, 2011
Sunday, January 16, 2011
I Got Crafty: Rosette Frame
So, I actually whipped out the paint and glue gun over the last two days...I'ts been a while, but it sure was fun!
Like many others, I hop around blogland from time to time, and one of the sites that I am inspired by is Ucreate, there are always such wonderful things posted there! Something that was started last year is a Create With Me! monthly craft-along. I stumbled upon the January post, and saw that we are invited to make a darling rosette frame following this tutorial from The Secret Stitch Club, how cute!
So, I picked up a blank frame, dug out the paint and glue gun, and got to work!
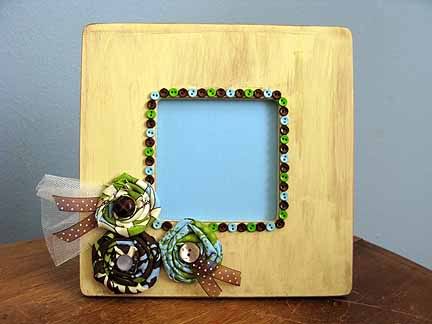
This is the result...
My rosettes didn't turn out quite like the one's in the tutorial, I guess I'll just have to make some more and experiment until I get that tighter twist...
Here is a closer look at the embellishments, the buttons and ribbon and tulle add so much cute dimension!
I haven't decided what I want to put in the frame yet...maybe a Valentine specimen layout...maybe one of the versions of the Keep Calm sayings that are all over now...but right now, I'm so tickled that I am crafting again that I smile every time I see it!
I am also linking up to the Altered Arts Challenge over at Sweet Paper Treats, a new find for me...you should play along too!
Breakdown of the project:
Supplies:
frame: from Michael's $1
paint: Craft Smart acrylic paint, from Michael's, 3 for $1, I used cream and brown
fabrics: tulle and 3 prints from Hobby Lobby, less than $3, and there is plenty left over
ribbon: from Hobby Lobby, $1, with a ton left over
buttons: larger ones on rosettes from stash, tiny blue, green and brown ones by Favorite Findings at Hancock Fabrics, $2.30 for two packages
Instructions: follow the tutorial at The Secret Stitch Club and modify as you wish!
Update: I figured out what I would like to put in the frame!
I thought that I'd make the display more of a seasonal one, than a holiday specific one...so I chose a couple of scrapbooking paper scraps and punched some butterflies using the new Fiskars butterfly punch...too cute!
After I punched out the butterflies, I scored on both sides of the 'body', then just used some quick-drying glue to put them right on the paper. I still smile every time I see my little frame!
Enjoy!
Meredith
Subscribe to:
Posts (Atom)