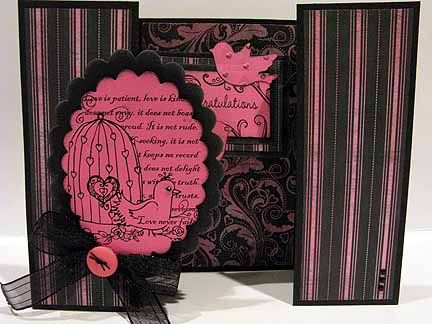
With all the gift giving and reception attending, my stash of ready congratulations cards is perilously low! So I got to work with an idea or two that I had...and here is the result!
At the Designed2Delight blog they have a weekly Designer's Challenge, this week it is to make a card using predominately pink and black...and the lightbulb went off!
I found the perfect stamp in the D2D store, that's the beauty of digital stamps...find, purchase, download and print...then get creating!
For both of my cards I kept the image simple...it is such a lovely collage on its own, I didn't want to distract from it. No coloring, just printed on colored cardstock.

I found a compimentary embossing folder for the background and inked the edges and raised pattern, then added some ribbon and a flower from stash...

The stick pin is from a recent swap, isn't it the perfect match? Most of the wedding cards I give are hand carried (instead of mailed) so I'm not worried about it getting smashed.

The second card got a bit more involved. I cased a card that I received in a swap a while ago...I'd never seen anything like it, and have intended to duplicate it for the longest time...I finally did tonight!
Here is the front view of the card as it is closed, you'd never know how much is in here!

I thought that I'd record the steps here...so if you want to make one too, you can!
Supplies needed:
- cardstock and patterned paper
- elastic thread
- 1/16" hole punch
- strong adhesive
- focal image
- strong adhesive
- embellishments as desired
2) Score your base cardstock at 2", 3 3/4", 7 1/4" and 9"
3) Fold the 3 3/4" and 7 1/4" scores toward eachother, the middle of the card and fold the 2" and 9" scores to the outside of the card, have a look at this picture to get a better idea...you end up with a card sized 4" x 5 1/2"

4) Add your patterned paper strips to the front (cut at 1 3/4" x 5 1/4") and inside (3 1/4" x 5 1/4") of the card
I have to share, my patterned paper started out like this...

but I didn't want the white on this card, so I used my pink ink and a foam sponge to color it!
5) Punch a hole on each 'inside' fold, knot one end of the elastic and thread it through, check to make sure that your knot is bigger than the hole! Double knot if necessary...
6) Thread it through the second hole, leaving approximately 3 1/2" inside the card (the width of the card back), knot the other side.
7) Put some strong glue on the knots, and let dry
8) For the center suspension, make sure that it is about 2" high, and no more than 2 3/4" wide, any wider, and you will not be able to close the card
9) Make the suspension several layers, and use a strong glue to sandwich the final layer between the rest, let it dry
10) Attatch your focal image to the front, and embellish the card as you like
As you open the card, the suspension comes forward and hangs...so intricate!

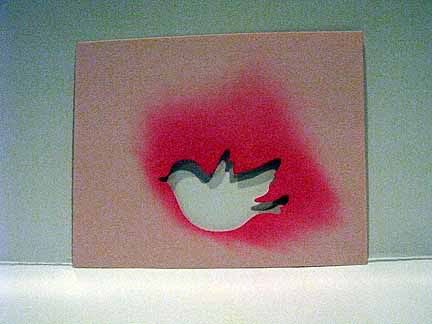
I couldn't leave the envelopes alone...but I wasn't sure what to do with them until I saw the negative from the bird punch that I used

I took that negative and sponged some pink ink through it, using it as a stencil...I'm so pleased with how it came out!

I'm definitely going to take a look at my punches again with fresh eyes...maybe you'll see more of this on some cards soon!
Enjoy,
Meredith
WOW gorgeous - love the embossing and one of my favorite images! Thanks for playing at Designed 2 Delight!
ReplyDelete