Monday, May 23, 2011

Summer Days progressive challenge

I had a lot of fun coloring the image from this weeks Designed 2 Delight progressive challenge. Is this not a cute, cute bear? You can pick yours up in the store and join in over at the blog any time!

I think I'll use this one for a special friend who could probably use a pick-me-up about now...

Photobucket

I'm still working on learning how to shade...doing better...but have a ways to go...

Photobucket

Enjoy,

Meredith

Wednesday, May 18, 2011

Somewhere Over the Rainbow Blog Hop

Welcome to the Sunny Days "Somewhere Over the Rainbow" Blog Hop! I know that you are having a great time hopping around and enjoying everyone's creations! You should have arrived here from Ana's blog...is she not the most joyful person? Endlessly creative, and a Twilight fan to boot ~ Fabulous!

The theme of this blog hop is "Somewhere Over the Rainbow". Each blog hostess has been assigned a color. At the end of this rainbow is the link to your pot of gold! Be sure to click through the link so you can join us in the Card Swaps forum for challenges, games, fun and prizes! We're all sure to have a lot of fun!

The color that I have been assigned is green (betcha guessed that already!) Normally, green is a color that I use to accent...so making it the focus of a card was different for me. I do love this color though...to me, green means Spring! My lawn greens up, my plants start sending out new growth and become happy mounds of green that I know will be covered in flowers soon, and we plant seeds and starts in the garden. Happy Green Spring!

And without further ado, here is my card:

It looks involved, but was very easy to put together. I used some doodle flowers from a Stamps of Life set to dress up my background paper, just randomly stamping and spacing where it looked good to me. Another smaller layer on top of that for the sentiment, and that's it for the cardstock and paper. The flowers are all from one package, and while I love layering them, I wanted to try something different this time. So I folded one of the flowers in half and put a shiny gem brad in the center middle, kind of like a black-eyed susan. I then folded another flower into quarters and used a button from my stash to accent the bud shape. The last flower is just the three types that came in the package layered together with a glittery brad in the center.

Photobucket

Supply list: cardstock:Hobby Lobby, patterned paper:My Mind's Eye, ink:TPC Studios, flowers and brads:The Paper Studio, stamps:The Stamps of Life

For the inside, I wanted enough room for the whole family to sign, so I covered the cardstock with patterned paper, stamped my sentiment, and scattered some more stamped flowers across the pages.

And hey...this is a plea to any designers out there...could we please have some awesome anniversary sets? With happy and anniversary in several different fonts and sizes...and maybe even some labels or frames to go around? There are so many wedding sets out there...but one wedding equals lots and lots of anniversaries!!! And if any of you know of any fabulous anniversary sets...please, leave me a comment and tell me where!!!

Photobucket

We aren't doing prizes on the blog hop today, because the real prize is seeing great ideas and filling your mind with inspiration. However, I do hope you leave a comment and let me know what you think! There is also a post in the forum where you can post any cards you make that are blog hop inspired. I do hope to see you there! Here is a link to the Cardmaker's Cardswaps forum...but don't go until you get through the blog hop, we'll all have this link for you!

Your next stop along the hop is Laura. She has a sense of style that won't quit and a sense of humor that goes even longer! I know you'll enjoy your visit!

In case you want a map, here is the complete list of blogs in order:

Lora
Susan H
Golda
Jane
Ana
Meredith ~ You are here!
Laura
Angelina
Ashley

Enjoy,

Meredith


Monday, May 16, 2011

Skater Boy

Week 2 down!

After uploading a card with last week's digital image, Faith of Designed 2 Delight sent me this adorable Skater Boy image! Would you like him too? You can head over to the shop and pick him up...and if you upload a card to the blog challenge, then you will be emailed the next image too!

I'm working on my coloring...still have a ways to go, I know! But the funny thing that I learned with this image was to check which pencils I'm using! I lay down a layer of blue around the image, intending to use a paintbrush and some water to blend it out to nothing...well, that only works if you use a watercolor pencil!!!

Oh well, next time!

Photobucket

The base is made from Coredinations color core cardstock, embossed with the diamond edge Cuttlebug folder. The rest of the cardstock is from my scrap pile, shapes cut with dies and punches and dimension added with a crimper. The sentiment is from a stamped set swap.

Enjoy,

Meredith

Thursday, May 12, 2011

Using the swap twinchies

So, a whole year ago...yes, that's right, a YEAR ago...I hosted a swap with the fabulous group over at the Cardmaker Magazine message board. If you haven't visited and become a part of this community yet...what are you waiting for? Its the friendliest place I've found on the web!

The swap was for birthday twinchies, so that I could have the beginnings of the million or so birthday cards that it seems I need each season. So after a successful swap, with fabulous twinchies like you see below overflowing my stash...

twinchies swap one

twinchies swap two

...how many cards do you think I have made with them? That's right...none! It seems that for me, coordinating my 'style' with someone else's is a little more difficult in practice than in theory...hmm.

So, determined to use these fabulous little gems to make equally great cards, I broke into the stash and started creating...and here are the results!

Photobucket

Terrie added the cutest little pom pom to her birthday hat...and with this card, I figured out the best ever glue to keep my bows on! Scotch Quick Dry Adhesive, comes in a bottle, and since it is a wet glue, takes a bit to dry...but once it does, that puppy is stuck! Fabulous!

Photobucket

I had fun with my Martha Stewart punch carrying on the 'dots' from the party hat.

Photobucket

This one I was so pleased with that I took a picture before the glue holding on the buttons was dry! It does dry clear, just so you know. And though it is difficult to capture in pictures, the background for this card is white glitter paper...all over glitter!

Photobucket

Really, this and several of the twinchies in the swap could be used for more than just birthday cards...but I decided to stick with birthdays because those really are the cards that I need most!

Photobucket

In case you were wondering, this is how I am signing the back of the cards...to give credit to the twinchie designers too...that is, if they signed them!

Photobucket

This is one of the twinchies that wasn't signed (sadness!), but the designer actually sent me (as the hostess) extra twinchies...and even extra punched cupcakes! I had enough to make three cards!

Photobucket

I changed the twinchie a bit by popping up the cupcake top, then used the extra cupcakes to border the bottom...I wanted to bring in some black because of the sentiment and think that the narrow ribbon adds just the right graphic accent...what do you think?

Photobucket

I had enough cupcake punches to add to the inside too.

Photobucket

This twinchie is actually mine...I was going for graphic and bright...with the intention of using them on cards for younger boys.

Photobucket

And on a side note...I finally got the die for the Happy Birthday sentiment to work! It took several experiments with shims and papers until I got the right combination...whew!

Photobucket

This twinchie is by Rainy B. I was surprised at how difficult this twinchie was to use on a card! You wouldn't think that black, white and red would be difficult to use, would you? I actually tried several combinations, and ended up using this fabulous black glitter paper...although you can't see it in my pictures, the glitter actually reflects in multiple colors, catching the red highlights fabulously!

Photobucket

I added hot-fix gems (love my i-rock!) to the tag and the lower left of the card...I'm thinking on coloring them red, to match the gem on the present...but I have to purchase a red alcohol marker to do it...maybe later this week...

Photobucket

And to tie in the inside of the card with the twinchie, I used the same pattern of doodling around the edge...black marker dots with silver glitter dots in the corners. (Although I didn't take a good enough picture for you to see the silver glitter clearly.)

This last card qualifies for a challenge over at the Do You Stack Up challenge blog, #19 Add a Tag. They have the neatest challenges over there, you should play along! I'm glad that I'm able to play along again...its been a while!

Do you have swap stashes too? Hopefully this post will inspire you to dig them out and start creating! It was a stretch to incorporate someone else's style into my cardmaking...but a good one!

That's all for today! Hopefully I'll have time and creative inspiration to use up some more of these fabulous twinchies soon, then I guess I'd have to host another swap!

Enjoy,

Meredith

Progressive Challenge

What an interesting spring we are having! Here in New Mexico, we have enjoyed temperatures in the 80's, then snow and freezing rain, then wind ready to blow everything away, then mild weather again! What an adventure!

I've managed to squeeze some time for crafting in between end-of-school-year activities and outside improvements (garden!), and finally, after receiving the emails about this challenge for a couple of months, I've managed to take the time to participate!

The challenge is from Designed to Delight digital stamps, and on their blog here, you will find the images and the rules...and if you play along one week, the next week's image is emailed directly to you! How cool is that?

So this is the card that I pulled together, very simply,

Photobucket

I printed the image, colored it with pencils, inked the edge and cut it out with an oval nestabilities die. Backed it with another die in a scallop edge, then added it to the card. Since the image has a quilt in it, I used a quilt patterned paper as background...and added a ribbon bow for a homey feel.

I haven't decided on a sentiment for this one yet...I figure that I can add one later when the right occasion presents itself...do you ever do that?

Enjoy,

Meredith

Sunday, April 3, 2011

I Got Crafty: Burlap Dry Erase Board


Well, I decided to have a bit of fun in the craft cave again...I should do this more often, since it ends with something nice for my home!

It started with the kitchen renovations...that story is on the other blog...here..., and no, we're not done yet...but soon, very soon...

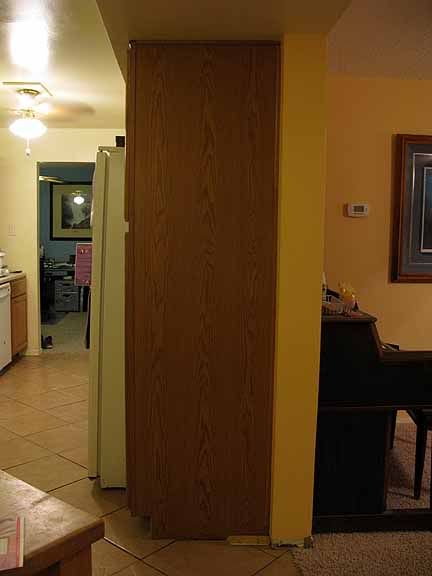
Anyway, now that I actually have a PANTRY in my kitchen ... yeah! ... I have this great view from the dining room table ...
Photobucket

Well...that could use a bit of something, couldn't it?

I was sure that I had the perfect idea...here is how the conversation went...(sort of...)

Me: Hey hon, wanna hear my great idea to put here?

Dh: Sure, whatcha want to do?

Me: I'm going to get an old kitchen cabinet door, then I'm going to paint the outside green like the kitchen walls, then paint the inside part with chalkboard paint...and we can have a chalkboard for our kitchen! Won't it be great?

Dh: Chalkboard? Why chalkboard? That sounds dark. I like whiteboards better, they're so much easier to use...could we just hang a dry erase board there?

Me: (dumbfounded look...) Dry erase??? Why would I want a big ugly whiteboard there?

So...enter blogland...(Thank you, blogland!!!) In one of the fabulous linky parties out there I ran across this tutorial from Get Your Craft On, and inspiration struck!

I decided to try my hand at a tutorial-type post...so bear with me...

Gather your supplies:

Frame with glass
burlap (or fabric, or paper...whatever you want)
masking tape

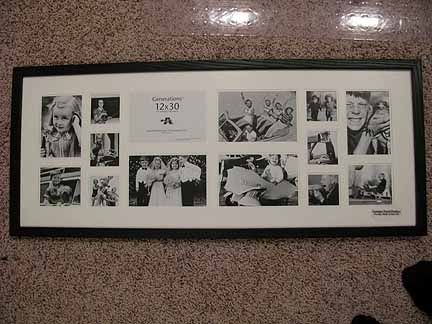
I pulled out a frame from the back closet, I bought this one at Kohl's on sale...
Photobucket

I'm not even going to come close to admitting how long ago I purchased this...

Then pulled out the burlap, (come on, you know you have some sitting at home, ready for a project....don't you?, don't you?)

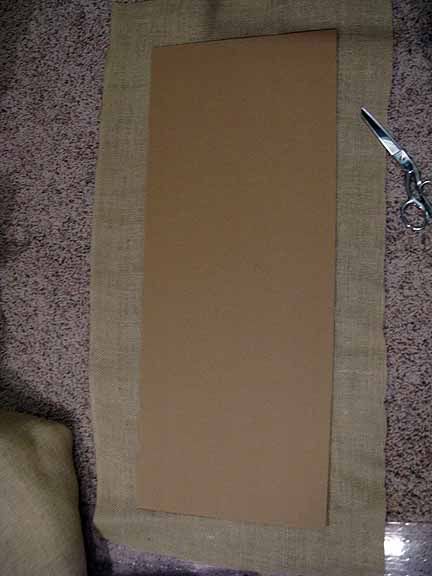
And cut a piece to extend around the cardboard backing of the frame.
Photobucket

I got out the extremely specialized tool then...the masking tape...and stretched the burlap around the cardboard, taping it in place to hold it down.

Now, I didn't take pictures of the in between step...but now would be a good time to clean the glass really well...before you reassemble the frame...

Photobucket

I did miter the corners (sloppily though) to cut down on the bulk...but as you can see, this is not a fancy job...hey, its the back...if I hadn't taken pictures, no one but me would ever have seen!

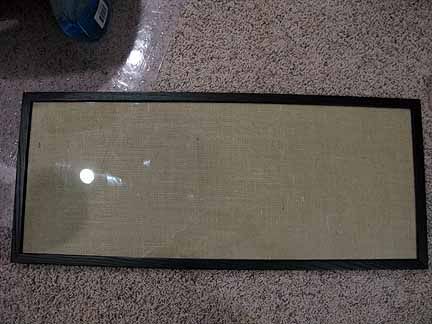
Put your glass back in the frame, put your burlap covered backing in....and flip it over to see your fabulous new dry erase board!!!
Photobucket

Hmm...........that's.............uhh..........well............underwhelming...............is the word that comes to mind...hmm...........

Well....now what do I do? I could cut some vinyl...or use a stencil and paint a design...or cut some fabric....or, I could take a look around what is currently my crafting passion and so is readily accessible in my craft room....stamping!

So, how about a few more supplies:

rubber stamps ( I used a fabulous one from Unity Stamp Co)
dye ink (I used Tuxedo black by Memento)
ribbon, whatever you've got that looks good with your project

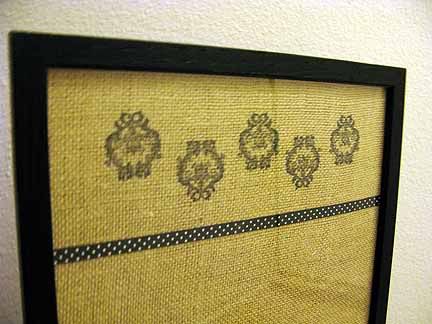
After experimenting for a bit with some spare burlap I decided on a border look, rotating and repeating the stamp across the top and bottom...with the ribbon as an accent.

So let's take a look now, shall we?
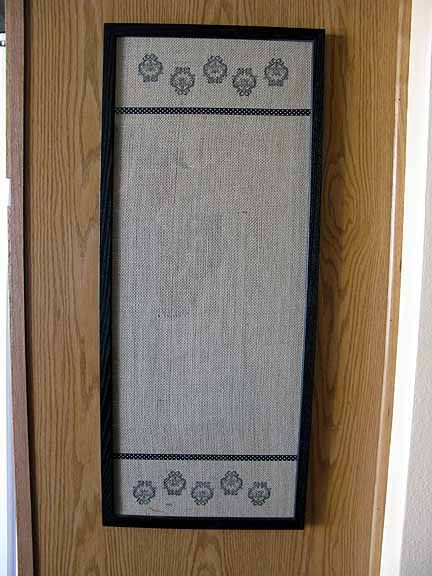
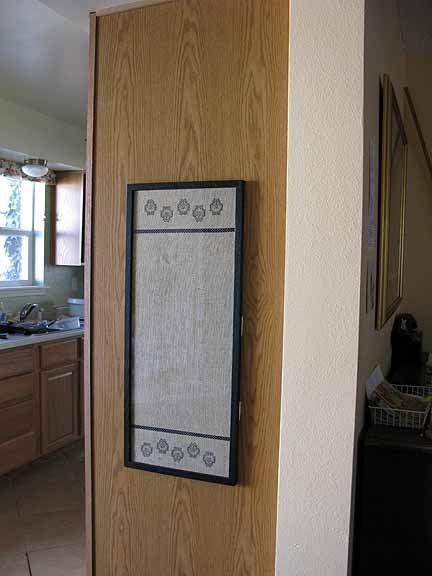
Photobucket

Photobucket

Much better, yes? I left a lot of blank space...as the intention is really to use this as a memo board...but you can get as creative as you would like to to suit your project!

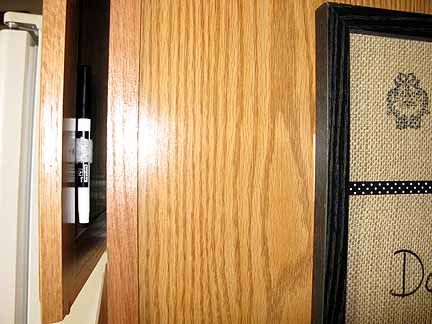
One last thing...the dry erase marker...I know that I could just let it sit on top of the frame...or tie it on with a ribbon...or even attach it with some velcro...my children are old enough that having the marker easily accessible is not a problem...but I didn't want to have it out...its not exactly pretty, you know?
Photobucket

So I tucked it away inside the cabinet door using some self-stick velcro...see? Nice and handy, but out of sight...good!

Here are the before and after views...

Before:

Photobucket

And now:

Photobucket

please try very hard to ignore the pile of dirty dishes in the sink...and on the counter...I had to take the pictures while I remembered to during the daytime...be nice!

...not exactly Ballard Designs...but better than nothing!

Thanks for reading! I hope you enjoyed my little tutorial!

I'm linking this post up over at Funky Junk Interiors Burlap Theme Linky and the Tatertots and Jello Weekend Wrap Up Party.


Meredith

Sunday, January 30, 2011

Someone's Having a Birthday!

So, a dear friend who lives all the way up in Oregon is having a very special birthday in February. She (and her husband) will be celebrating the first anniversary of the birth of their son!

Since my youngest will be turning 12 this year, it has been a while since we've celebrated that particular birthday!

I know that little C won't particularly care about a card right now, but after going through many of my mom's things last fall, and finding adorable cards from her childhood and mine...I took the time to make a special card, just for him.

I started with the sketch from the Clean & Simple Stamping blog, FTL #125...I have the best time with their sketches...if you have not checked them out before...do...you will love it!

Photobucket

I also have a few ideas running around in my head for the challenge over at Do You Stack Up?, Patterns... Then I found some great papers at JoAnn's, and took it from there!

Photobucket

Supplies: cardstock: purple (DCWV), turquoise (Coredinations), cream (stash); patterned paper: birthday, (DCWV); ink (TPC Studio); embossing folders: dots, plaid (Sizzix), swirls, squares (Cuttlebug); gems: i-rock by imaginesce; other: sandpaper

After embossing the patterns into the turquoise patterned paper, I sanded the raised designs to add another layer of pattern...

Photobucket

And yes, these are some more gems that I attached using my i-rock tool...I think I'll be using these fairly often...they are just so much fun to put on! And way easier to line up than brads...while the glue is still melted, you can nudge the gem into place...be careful though, it is still hot! Ask me how I know...

Photobucket

The real fun for this card came when it was time to do the inside...

Photobucket

I just love clear stamps! I used stamps from three designers and five different sets to put this little phrase together. Please, tell me that you can read what it says??? When I showed it to my daughter and husband they both got funny looks on their faces for a minute...and after puzzling it out, they could read what it says....

To get my phrase, I laid out the stamps on my inside layer, then placed a clear block over them...I inked up the stamps, then made a test stamp on a scrap piece of paper...and am I glad that I did! The stamps are different thicknesses! Even stamps made by the same designer! So I ended up inking up the stamps in several steps...and lining them up to get what I wanted...but hey, it worked!

Stamps used: 1: Penny Black; L,W: The Paper Company Studio; small letters, happy, birthday: The Stamps of Life

Enjoy,

Meredith