Sunday, January 30, 2011

Someone's Having a Birthday!

So, a dear friend who lives all the way up in Oregon is having a very special birthday in February. She (and her husband) will be celebrating the first anniversary of the birth of their son!

Since my youngest will be turning 12 this year, it has been a while since we've celebrated that particular birthday!

I know that little C won't particularly care about a card right now, but after going through many of my mom's things last fall, and finding adorable cards from her childhood and mine...I took the time to make a special card, just for him.

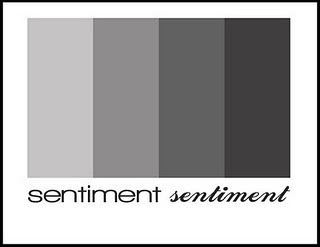
I started with the sketch from the Clean & Simple Stamping blog, FTL #125...I have the best time with their sketches...if you have not checked them out before...do...you will love it!
Photobucket

I also have a few ideas running around in my head for the challenge over at Do You Stack Up?, Patterns... Then I found some great papers at JoAnn's, and took it from there!

Photobucket

Supplies: cardstock: purple (DCWV), turquoise (Coredinations), cream (stash); patterned paper: birthday, (DCWV); ink (TPC Studio); embossing folders: dots, plaid (Sizzix), swirls, squares (Cuttlebug); gems: i-rock by imaginesce; other: sandpaper

After embossing the patterns into the turquoise patterned paper, I sanded the raised designs to add another layer of pattern...

Photobucket

And yes, these are some more gems that I attached using my i-rock tool...I think I'll be using these fairly often...they are just so much fun to put on! And way easier to line up than brads...while the glue is still melted, you can nudge the gem into place...be careful though, it is still hot! Ask me how I know...

Photobucket

The real fun for this card came when it was time to do the inside...

Photobucket

I just love clear stamps! I used stamps from three designers and five different sets to put this little phrase together. Please, tell me that you can read what it says??? When I showed it to my daughter and husband they both got funny looks on their faces for a minute...and after puzzling it out, they could read what it says....

To get my phrase, I laid out the stamps on my inside layer, then placed a clear block over them...I inked up the stamps, then made a test stamp on a scrap piece of paper...and am I glad that I did! The stamps are different thicknesses! Even stamps made by the same designer! So I ended up inking up the stamps in several steps...and lining them up to get what I wanted...but hey, it worked!

Stamps used: 1: Penny Black; L,W: The Paper Company Studio; small letters, happy, birthday: The Stamps of Life

Enjoy,

Meredith

Friday, January 28, 2011

Spring Fever

So, over at Cardswaps there was a swap to make Spring cards...and it took me forever to put together a design this time! But I found some adorable paper and cardstock at JoAnn's last week, so I finally got these done!

The patterned paper that I found also happens to fit the newest challenge over at Do You Stack Up? Patterns...

I thought that the butterflies with their different patterns were a good take on this challenge...but I have an idea for another card to fit it too...we'll see if I have time to put the other idea into practice later!

You have until Wednesday, so why not join in on the fun?

Photobucket

Supplies: butterfly paper: Me & My Big Ideas; green polka dot: DCWV, cardstock: white: stash; purple: Coredinations, stamp: StudioG, butterfly punch: Fiskars, gems: i-rock by Imaginesce, ink: TPC studios

I make thank you cards for the swap, but when I made the one extra for myself, I already have plenty of thank you cards in my stash box, so I switched out a few things and made a birthday card, since I need plenty of those still!

Photobucket

Here is a closer look at the details...I am really enjoying the Fiskars punches...they cut the paper nicely, the squeezable handles are very comfortable, and the seasonal designs are so cute!

Photobucket

And I even got to play with a new tool that I purchased last month (Happy Birthday to me!), the i-rock, a tool that applies heat-set crystals. It was awesome!

Photobucket

And last, but not least...do you decorate your envelopes too? I don't normally send envelopes with a swap, but for this one the hostess requested that we do...so I couldn't just send plain ones, could I?

I do like to stamp the envelopes just a bit...enough to add a little fun, but not enough to make them hard to mail...this little butterfly stamp seemed just the right touch for this set.

Photobucket

Enjoy,

Meredith

Wednesday, January 26, 2011

Think Pink

Just the quickest little post today, to post my entry for the Think Pink Challenge over at Do You Stack Up?.

I picked up the paper and cardstock from JoAnn's, then went with what started out as some simple layering, but turned into some banners and sewing!

I love the way that it turned out, lots of layers, but still easy to mail!

Photobucket

Enjoy,

Meredith

Monday, January 17, 2011

Seeing Gray...

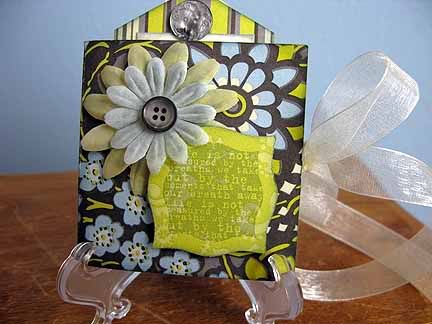
So I picked up this pad of coordinating paper a bit ago...some lovely designs by Amy Butler, published by K&Company, that I thought have the loveliest color combinations. The papers are all shades of gray, green, blue, ivory and the tiniest bit of pink. The designs are mostly graphic, with strong lines and bold forms...truly striking.

My dilema came when I needed to choose a project to use these papers...what to do? I had seen projects around the web that ranged from simply framing them under glass (they are lovely enough) to various card projects...none of which appealed to me.

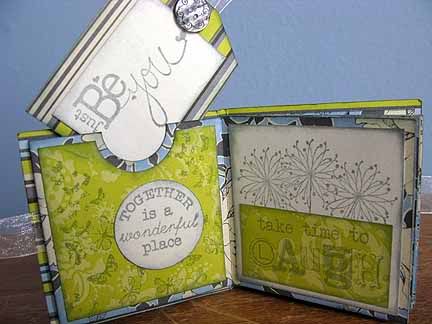
I finally decided to make a mini album, one just for me, full of ink and stamps and lovely colors, one designed to make me smile every time I flip through it...so I did.

Photobucket

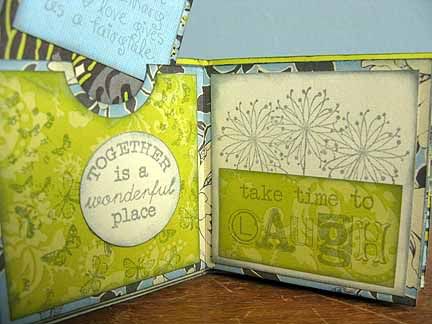
I chose to make a 3" x 3" meandering maze album, it is a type of album that you make the pages from just one sheet of 12" x 12" paper...so clever! I used a combination of the instructions from a few different sites, just google meandering maze album and take a look, there are several great tutorials out there.

I love the look of distressing things, so I gave my sponges a workout inking all the edges of the pages and layers...

Photobucket

All the stamps I used are from Unity Stamp Company, from various Kit of the Month's...they do such a clever job of making the phrases look unique! I chose the phrases that make me happy!

Photobucket

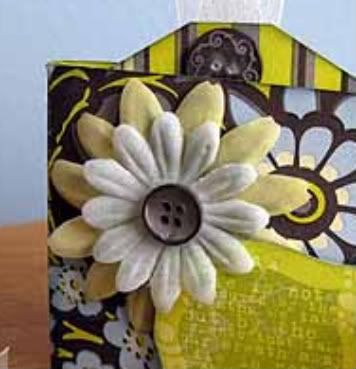
The flowers I wanted to use were too bright and new from the package, so they got the ink treatmant too...it gave them the perfect gray tint to coordinate with the paper.

Photobucket

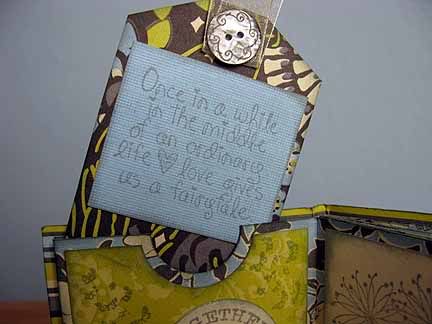
I pulled buttons and ribbons from my stash, and had fun choosing layers and shapes to add to the album to make it shabby enough to make me smile...

Photobucket

When you make the album, because of the way you fold the 12" x 12" paper, you have the option to include some pockets...I included four in my album, so that I could insert tags and include even more quotes that make me happy.

I love how it turned out, and look forward to finding more fabulous sentiment stamps that make me happy, so that I can fill up the pages!

This album was made to fit two challenges, The Gray is the New Black Challenge over at Moxie Fab World, and the No Stress, Distress! challenge over at the Do You Stack Up? challenge blog. You should play along too!

Enjoy,

Meredith

Sunday, January 16, 2011

I Got Crafty: Rosette Frame

So, I actually whipped out the paint and glue gun over the last two days...I'ts been a while, but it sure was fun!

Like many others, I hop around blogland from time to time, and one of the sites that I am inspired by is Ucreate, there are always such wonderful things posted there! Something that was started last year is a Create With Me! monthly craft-along. I stumbled upon the January post, and saw that we are invited to make a darling rosette frame following this tutorial from The Secret Stitch Club, how cute!

So, I picked up a blank frame, dug out the paint and glue gun, and got to work!

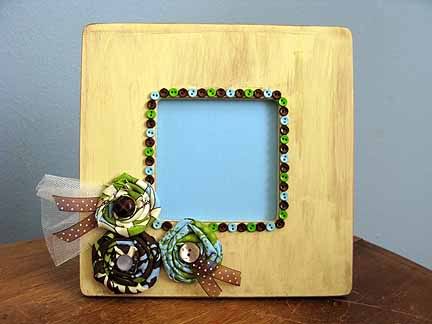
This is the result...

Photobucket

My rosettes didn't turn out quite like the one's in the tutorial, I guess I'll just have to make some more and experiment until I get that tighter twist...

Here is a closer look at the embellishments, the buttons and ribbon and tulle add so much cute dimension!

Photobucket

I haven't decided what I want to put in the frame yet...maybe a Valentine specimen layout...maybe one of the versions of the Keep Calm sayings that are all over now...but right now, I'm so tickled that I am crafting again that I smile every time I see it!

I am also linking up to the Altered Arts Challenge over at Sweet Paper Treats, a new find for me...you should play along too!

Breakdown of the project:

Supplies:
frame: from Michael's $1
paint: Craft Smart acrylic paint, from Michael's, 3 for $1, I used cream and brown
fabrics: tulle and 3 prints from Hobby Lobby, less than $3, and there is plenty left over
ribbon: from Hobby Lobby, $1, with a ton left over
buttons: larger ones on rosettes from stash, tiny blue, green and brown ones by Favorite Findings at Hancock Fabrics, $2.30 for two packages

Instructions: follow the tutorial at The Secret Stitch Club and modify as you wish!

Update: I figured out what I would like to put in the frame!

I thought that I'd make the display more of a seasonal one, than a holiday specific one...so I chose a couple of scrapbooking paper scraps and punched some butterflies using the new Fiskars butterfly punch...too cute!

Photobucket

After I punched out the butterflies, I scored on both sides of the 'body', then just used some quick-drying glue to put them right on the paper. I still smile every time I see my little frame!

Photobucket

Enjoy!

Meredith

Tuesday, January 11, 2011

Birthdays!

So I have this goal that I try to adhere to when giving gifts to the nieces and nephews...

I try to give the gift of an activity, rather than just a present. So this year, for Christmas, I gave the nieces and nephews (I have two of each) a plain white ceramic frame that came with permanent markers to draw and decorate on the frame. Then I included a disposable camera and a gift card to pay for developing the camera. The intent was for the children to take pictures of things that are important or meaningful to them...without regard to adult opinions.

The gifts were a hit (yes!) but there was a problem...the frame can only hold one picture! Enter their birthday gifts...and since the birthdays are all in January and February, no one has to wait very long.

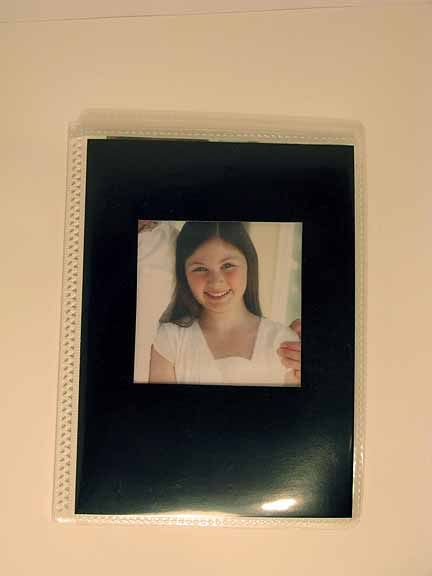
For their birthdays, I am sending each of the children a small photo album that has been personalized with colors and either their names or initials. Cool? I hope they think so!

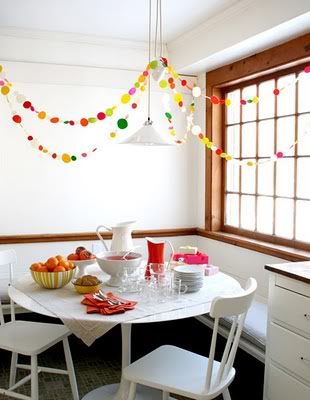
I was inspired by the Moxie Fab Tuesday Trigger: Bright Spot for the album and card for my niece Belle...these bright dots just shout, "Copy me!"

Here is the Tuesday Trigger photo:

Photobucket

Does it inspire you? You should go join in on the fun!

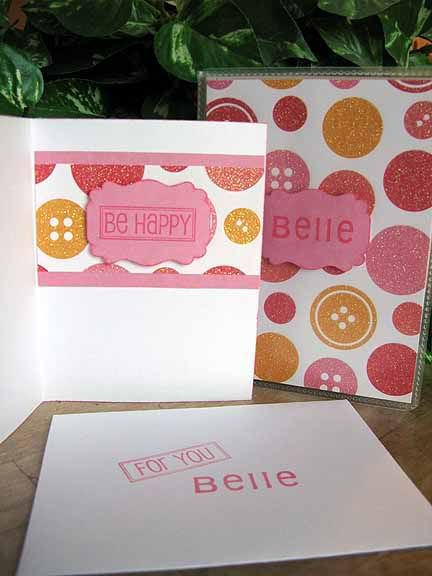
And here is the set for my niece, I made the album, a matching card and stamped the envelope too, 'cause that's always fun...

<span class=

And the inside of the card has more sparkly dots...

<span class=

Supplies: album: Best Occasions, cardstock: stash, patterned paper: Martha Stewart, stamps: The Stamps of Life, ink: Martha Stewart, punches: EK Success

The album is so simple to make...they look like this on the shelf at Wal-mart, I found mine over close to the tiny remnant of scrapbooking supplies that they still carry, and its only $1!

original album

And you just remove the inserts in the front and back covers to make room for whatever you want to personalize it with!

Here is one that I made for my nephew Mitchell...he loves orange.

personalized album

Supplies: album: Best Occasions, patterned paper: Target $1 section, chipboard alpha: Cloud 9 design

I hope that they are as well received as the cameras and frames were!

Meredith

Thursday, January 6, 2011

Back to cardmaking

Oh, I am so glad to have the world wide web for inspiration! Throughout December I was struggling to feel creative...it was a good thing that I had a stash of Christmas cards that I had made earlier to use for the card exchange that I was in...or I would have been in trouble!

So I spent most of the month surfing around the web, soaking up all of the lovely projects that are out there that I could see...without feeling the desire to head into my craft cave at all...

But, when the challenge came to use buttons on a card, I knew exactly what I wanted to do! And I ran into my craft cave and did it! (After making a quick run to the craft store for some adhesive, since the ones I had wouldn't hold the buttons on...)

And here we go!

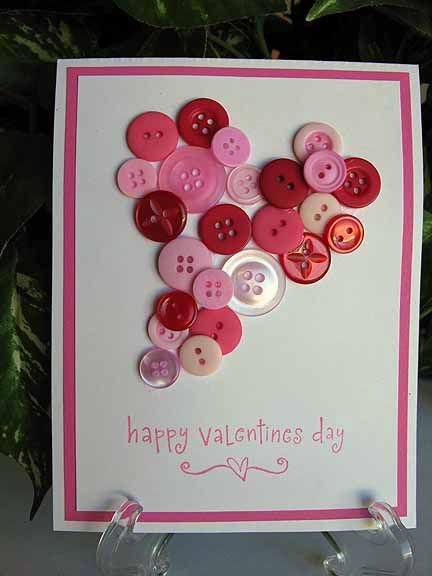
valentine button heart

The cardstock and buttons are from my stash...is it a bad thing that using this many buttons on one card didn't even put a dent in my button jar? The stamp is from Katie & Co.

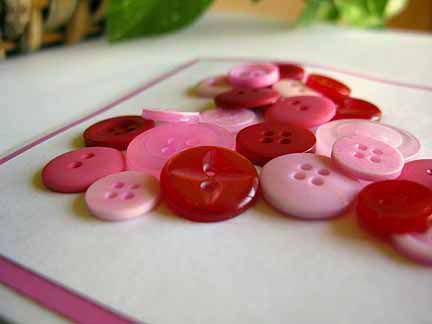
Here is a closer look at the way the buttons are piled on...

button closeup

Isn't that just clean, simple and fabulous?

It was too easy to do...I made the card, this one is a top fold A2 size, I added the pink mat and white front layer, cutting them 1/4" smaller than the layer before, then I traced a wooden heart shape onto the front of the card lightly with a pencil. Originally, I had intended to just fill the heart with buttons, but I did not have the sizes necessary to do that without distorting the heart shape or leaving too many gaps for the look I intended. So...I piled them on top of one another and voila! Fabulousness!!!

I'm linking this little card up to the first challenge over at the new Do You Stack Up? challenge blog...go have a look, they are off to a roaring start!

Enjoy,

Meredith