Saturday, April 21, 2012

Another Father's Day card

I've been having a great time in the craft room, and completed a few more Father's Day cards for the Operation Write Home blog color challenge.
I used the same lighthouse stamp that I used on the prior card, just the whole stamp this time. This turquoise and brown color combo is just perfect for acting like the ocean/sky in the background.

Photobucket

I thought that the sentiment stamp was a nice one to go with the lighthouse, I was inspired for the card layout and sentiment choice by a card in the latest Cardmaker magazine.

Photobucket

Thanks for stopping by!

Meredith

Friday, April 20, 2012

Back to Challenges and Fun!

Long Time No Cardmaking!


But I'm back to the craft room now! Now that tax season is over...I can have fun again!

I had a lovely day playing with paper and stamps, and have twelve cards done!

This was assembly line cardmaking...for a good cause...

Have you heard of Operation Write Home? If not, click on over to http://operationwritehome.org/ and read all about it, its a great program!

There is also a cardmaking challenge blog for the site http://www.owhstarsandstamps.org/ and I participated in the color challenge that they posted just a bit ago.

The challenge was to use turquoise and brown, such pretty colors! I'm pleased with the way that these turned out...

I chose to make Father's Day cards and generic masculine cards, the only difference is that for the latter I left off the Happy Father's Day stamp...

Photobucket

Here is the inside...

Photobucket

Nothing fancy...but I managed to make 12 of them with the supplies that I had on hand! Ten will be shipped to OWH this week, two have been tucked away for the Dads in June.

Thanks for stopping by!

Meredith

Wednesday, November 16, 2011

Autumn Blessings Crop

Welcome to the Autumn Blessings Blog Hop!

We're hopping around the web in celebration of our blessings at this beautiful time of year! Thank you for joining us and we hope you leave with a bit of inspiration and maybe a new friend or two! After the blog hop, please be sure to stop by the Cardmaker Cardswap Forum to join in for several days of challenges for creating and fun!

You should have arrived here from Lora's blog, aren't her projects the best? She has such a versatile style, clean and simple, with just the right touches of embellishment to set off whatever project she is making perfectly! If you didn't land here from Lora's blog, please click on over to visit her so that you don't miss any of the great things we have in store for you!

I have a life filled with many blessings...don't we all? Today I would like to express my gratitude for my friends. I have such lovely friends in my life, so many people who have helped me to become the person that I am today. Friends who encourage me to overcome struggles that I have, friends who applaud my accomplishments, good friends who compliment me on improvements that I make and great friends who comfort me in my times of need. I am so grateful for the love that each of them shares with me in different ways. I hope that each of you take some time today to thank a special friend that you have in your life.

Thank you for sharing that special thought with me.

Now, on to my project! I wanted a quick project that would give me (or whomever I give it to) a quick pick-me-up whenever I saw it.

I chose to make a bookmark. You will not believe how easy this was to make! I am looking forward to making several more as gifts for my friends this holiday season, after all, doesn't everyone need another bookmark?

Photobucket

It reads, "experience is not what happens to you. it's what you do with what happens to you."

I used:
cream canvas,
stamps (Tim Holtz),
three layers of cardstock (Bazzil, Co'ordinations, Reminisce),
ink (Distress Ink, Memento Ink),
sewing machine,
other (adhesive, 1/16" hole punch, fiber).

Cut the canvas to 1 3/4" x 6 3/4" and stamp with Distress ink for background. Use darker contrast ink to stamp main sentiment. Use adhesive to hold canvas in place on one or two layers of cardstock and stitch canvas around edges. Adhere final cardstock as backing to cover stitching. Punch hole at top and insert fiber.

Thanks for stopping by my little blog, your next stop is Judy's blog, and I know that you will enjoy what she has in store for you. Not only is she an exceptionally talented cardmaker, with a superb sense of design, she colors her images beautifully (a talent that I have yet to master), and her altered art projects are simply divine!

Here is the full list of blog participants, in case you get lost along the way:

Lora
Meredith <--- You are here
Judy L
Golda
Ana
Traci
Angelina
SusieQ
Tina
Ivanka
Jane

Monday, August 15, 2011

I See Pumpkins!

The progressive challenge image over at Designed2Delight for this week is a stitched pumpkin, and it is so cute!

I printed it off and colored it with pencils...I even went for some shading to add dimension...didn't turn out too bad!

Photobucket

I did put a wooden button over the image where it had three buttons...it just looked cleaner to me.

I pulled out a fall themed mat stack for papers, and colored the bling with a permanent marker to get it orange, finished it off with some ribbon, and done!

I haven't decided on a sentiment yet...maybe just a 'thinking of you' to send in the next couple of months, although it could certainly be a nice Thanksgiving card as well...we'll see.

Enjoy,

Meredith

Saturday, August 13, 2011

Wedding Inspiration

This has definitely been the summer of weddings around here! In the past three months we have received invitation after invitation...its been exciting! Unless I know the couple exceptionally well, I prefer to give a gift card...which means a handmade card to put it in, of course!

With all the gift giving and reception attending, my stash of ready congratulations cards is perilously low! So I got to work with an idea or two that I had...and here is the result!

At the Designed2Delight blog they have a weekly Designer's Challenge, this week it is to make a card using predominately pink and black...and the lightbulb went off!

I found the perfect stamp in the D2D store, that's the beauty of digital stamps...find, purchase, download and print...then get creating!

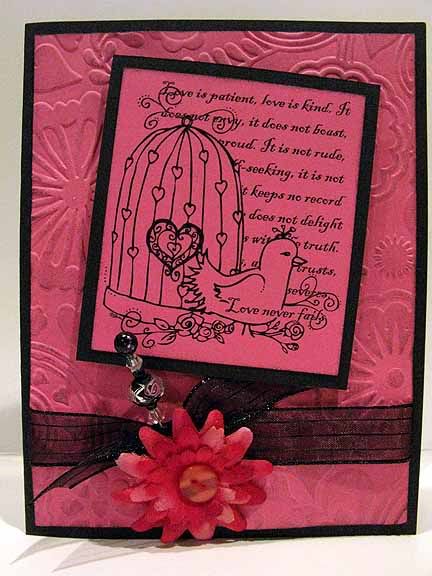
For both of my cards I kept the image simple...it is such a lovely collage on its own, I didn't want to distract from it. No coloring, just printed on colored cardstock.
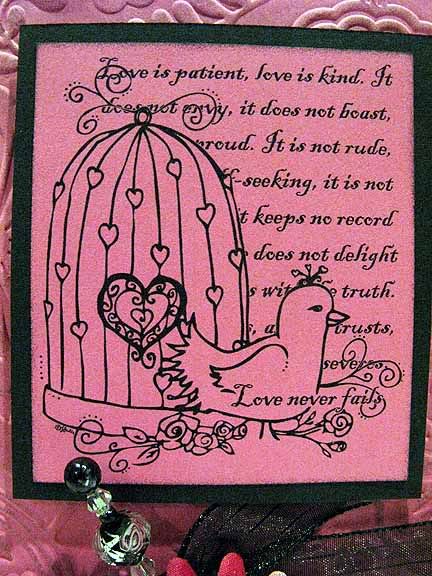
Photobucket

I found a compimentary embossing folder for the background and inked the edges and raised pattern, then added some ribbon and a flower from stash...
Photobucket

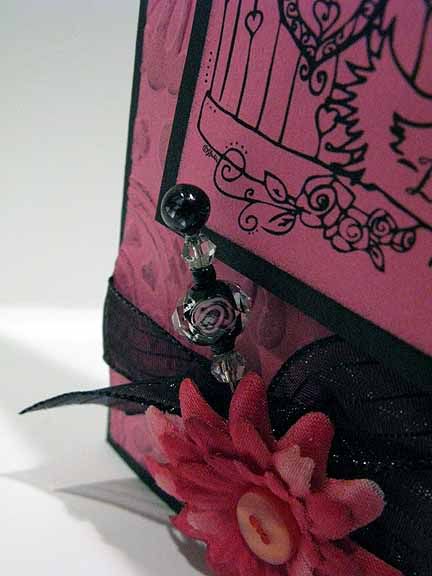
The stick pin is from a recent swap, isn't it the perfect match? Most of the wedding cards I give are hand carried (instead of mailed) so I'm not worried about it getting smashed.
Photobucket

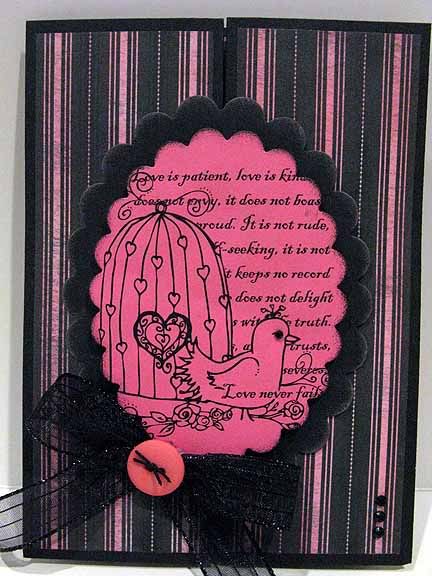
The second card got a bit more involved. I cased a card that I received in a swap a while ago...I'd never seen anything like it, and have intended to duplicate it for the longest time...I finally did tonight!

Here is the front view of the card as it is closed, you'd never know how much is in here!
Photobucket

I thought that I'd record the steps here...so if you want to make one too, you can!

Supplies needed:


  • cardstock and patterned paper

  • elastic thread


  • 1/16" hole punch


  • strong adhesive

  • focal image

  • strong adhesive


  • embellishments as desired
1) Cut your base cardstock to 5 1/2" x 11"

2) Score your base cardstock at 2", 3 3/4", 7 1/4" and 9"

3) Fold the 3 3/4" and 7 1/4" scores toward eachother, the middle of the card and fold the 2" and 9" scores to the outside of the card, have a look at this picture to get a better idea...you end up with a card sized 4" x 5 1/2"
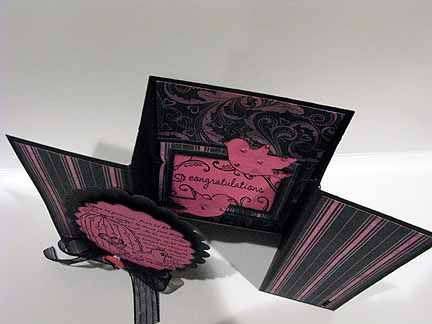
Photobucket

4) Add your patterned paper strips to the front (cut at 1 3/4" x 5 1/4") and inside (3 1/4" x 5 1/4") of the card

I have to share, my patterned paper started out like this...
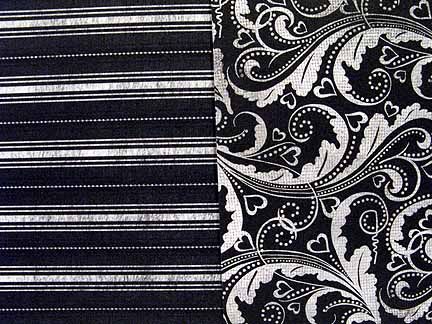
Photobucket

but I didn't want the white on this card, so I used my pink ink and a foam sponge to color it!

5) Punch a hole on each 'inside' fold, knot one end of the elastic and thread it through, check to make sure that your knot is bigger than the hole! Double knot if necessary...

6) Thread it through the second hole, leaving approximately 3 1/2" inside the card (the width of the card back), knot the other side.

7) Put some strong glue on the knots, and let dry

8) For the center suspension, make sure that it is about 2" high, and no more than 2 3/4" wide, any wider, and you will not be able to close the card

9) Make the suspension several layers, and use a strong glue to sandwich the final layer between the rest, let it dry

10) Attatch your focal image to the front, and embellish the card as you like

As you open the card, the suspension comes forward and hangs...so intricate!
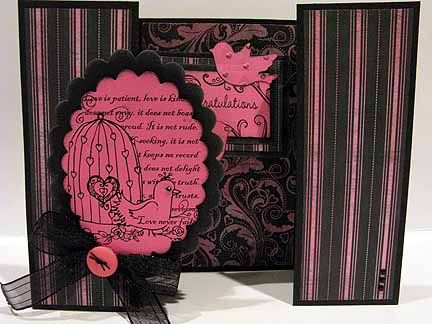
Photobucket

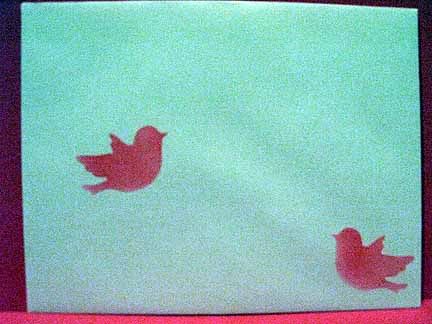
I couldn't leave the envelopes alone...but I wasn't sure what to do with them until I saw the negative from the bird punch that I used
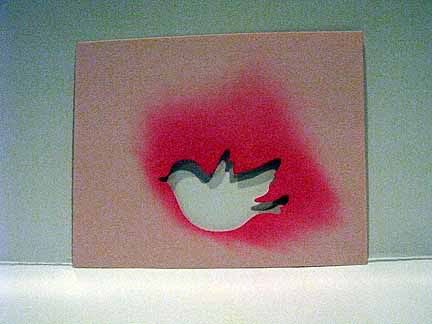
Photobucket

I took that negative and sponged some pink ink through it, using it as a stencil...I'm so pleased with how it came out!
Photobucket

I'm definitely going to take a look at my punches again with fresh eyes...maybe you'll see more of this on some cards soon!

Enjoy,

Meredith

Wednesday, August 10, 2011

Summer's End Blog Hop

Hello and Welcome!

I'm so glad you joined us on the Cardswaps Summer's End blog hop!


You should have come here from Ashley. If not, be sure to start at Lora's blog so you don't miss any of the great projects!


At the end of the hop, be sure to hop on over to the forum for more fun, games, challenges and...PRIZES!!!


The crop will be going on from August 10th - August 13th, 2011 and you have until 11:59pm CST August 16th, 2011 to get your projects uploaded.


But enough about that...you're here to hop along and get inspired, right?


The theme of our crop and blog hop is Summer's End.


We have hostesses that are going to help you spell out SUMMERS END in products, techniques, embellishments or anyway they can.

My assigned letter was M.
There are so many ways to use M! Masking, Monograms, Marigolds, Monsters...in the end, I decided to use a Mouse!

Photobucket


This is a digital stamp from Designed2Delight...who happens to have a challenge going on right now where if you use this stamp (which you can get for free!) you will be emailed another stamp!

Photobucket


Oh, and the D2D blog has another weekly challenge...this week's is to add bling to your card...and what goes better on a birthday card than gems and glitter?

Your next stop on the hop is Ana! Hop on over and see what fabulousness she has for you!


In case you get lost along the way, here are all the hostesses for the blog hop...


Friday, June 3, 2011

Orange You Glad Its Summer?

What a blast this card was to make! The challenge over at the Do You Stack Up? blog is to use the color orange...and I just happen to have a son who loves that color...so I am definitely stocked up!

One of the sponsors of this challenge is Karen's Doodles and as I was wandering through the shop when I found this adorable monkey image...for free!!!

I'm catching up on some cards for birthdays...so that's what I made!

Photobucket

I colored the image with my Prismacolor pencils and inked the edges of all the ivory cardstock with a Dew Drop ink pad. The patterned paper is from a K & Co. pack and I printed the sentiments on my computer. The ribbon is from The Paper Studio.

Another z-fold...this one is a bit different from the first, in that the 'folded' part is cut smaller and put on a base of flat cardstock...although I've seen it put on the front of a card as well...clever if you want more writing space!

Photobucket

I ended up putting some ribbon to the side, because I read my score-board incorrectly and scored the first line too soon. Instead of the z-fold being symmetrical it ended up uneven...but I decided that I liked it so just left it that way.

Photobucket

And like I wrote, I'm late sending it for a birthday...here's what I put inside...

Photobucket

Isn't this little monkey just the cutest? Click on over to Karen's Doodles to pick it up for yourself!

Photobucket

Enjoy,

Meredith