Thursday, September 30, 2010

Playing with free svgs

Well, it is a tremendously generous world out there...and I am grateful for being able to share in the bounty...

If you do a search for 'free svg' you will come up with a lot of sites and blogs that have them available....one such place that I have downloaded a few files from is the Free SVG Blog, and yesterday I tried out one of the files....fabulous!

Photobucket

It was originally designed to be cut out as a 12x12 page...which I will certainly use it for another time...but I wanted a 'lace' background for a card, so I resized the file, and used MTC to send it to my cricut to cut....I'll admit, I was a bit nervous, because of all the small cuts and curves...but it worked beautifully!

Here is my finished card...with the gorgeous lace background....thank you to generous designers who share their files for free!!!

Photobucket

Now, I know you want this file...so you head right on over to the Free SVG Blog and pick it up...be sure to leave a thank you!

I'm inspired to learn how to make one of these lace backgrounds for myself...only make it in a size intended to be used on cards....4" by 5 1/4"....that would easily scale just a bit up or down....hmm....looks like I'll be playing with a graphic editing program soon!

Enjoy,

Meredith

Tuesday, September 28, 2010

I've found a new toy!

So, I purchased a cricut a while ago ~ and then I purchased an expression machine a couple of months ago...and they are a lot of fun ~ but they are not my 'new' toy....

...here's the brief back story: my women's group at church is hosting a crafter's weekend, and the lady in charge of planning it found this great project Be Blocks ...well, we searched high and low for the already cut vinyl lettering with no luck...so, being me, I volunteered to come up with the pattern and cut the vinyl...even though at the time I had no inkling how to do so...

...enter my new toy...Make the Cut! MTC is a software that works with your cricut and allows you to cut fonts and images that are not on your cartridges...too cool!

I have found this software to be extremely user friendly ~ any features that I have wanted to use, and have not figured out in the first few minutes, I have been able to find tons of tutorials online and through the MTC message forum (thanks, y'all!).

So, one of the features that I am totally in love with ~ besides the ability to cut true type fonts ~ is the ability to import a jpg and MTC will 'trace' the image, and make a cutting file! It is too easy, and it is fabulous!!!

For example...this is the shape of a new EK Success punch that I purchased recently

Photobucket
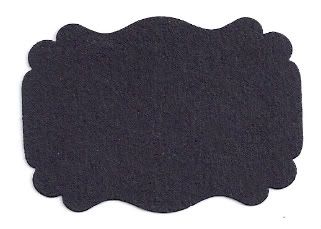
I adore this shape, and am using it in a mini album that I am putting together with family pictures, among other things...

Photobucket

My dilema was this...I wanted to mat the shape, but there are no other sizes of this punch available! I didn't look right matted on a basic shape, and I'm not very patient, so handcutting mats did not appeal to me.

Enter MTC! I punched out the shape in black, scanned it into MTC, and voila! I have my shape in any size or ratio I want! It's wonderful! I can now cut this shape out larger for mats of the original punch...

Photobucket

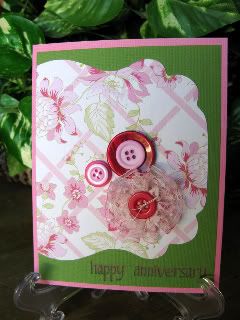
Or smaller for accents (this is the back of the 3" album)

Photobucket


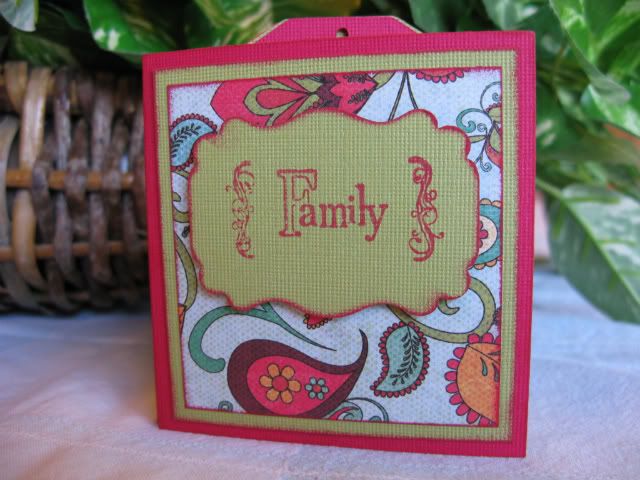
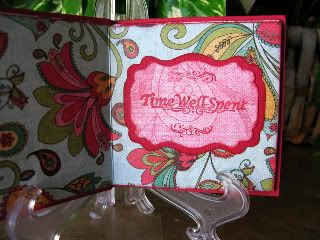
Or...super-sized for cards!

Photobucket

Isn't that awesome? Can't you just picture the possibilities? I have lots of punches that I don't use as much as I could, because I either don't own or don't have available larger and smaller sizes...what freedom I have now!

For those of you who have already discovered Make the Cut or a similar program, here is a link to the svg file for my awesome real estate sign shape.

Photobucket


real estate sign svg


Ettiquiette for digital files: Feel free to use the cut shape however you wish, but please do not share the file itself. Please direct inquiries back to this post. Thank you.

Enjoy,


Meredith


Saturday, August 21, 2010

Seeing Red (TSOL16)

It's that time again...challenge time over at The Stamps of Life blog...and I've finally managed to upload my picture of the card I made to participate!

The challenge is "Seeing Red" - feature the color red on your card...

I tossed some papers out on my workspace and came up with the color combo of red, kraft and cream...whatcha think?

tsol challenge

tsol challenge inside

I used the new release for the month of August, Trees2build, and a special release from July, Youare2kind...I love how you can build the little bird any way you want to...and this sentiment set is fast becoming my favorite...

Thank you for looking!

Meredith


Holiday Cards, Swapping Fun!

I really enjoy swapping...it is fun to make cards that you know will be appreciated by the recipient, someone to ooh and aah over your work...

I joined a swap for holiday cards over at the Cardmaker magazine message board...my favorite place to 'hang out' with friends online. Each person in the swap group is responsible for one holiday...I joined two groups, so I'm doing two holidays.

In one group I was given Valentines Day, here is my card...super simple and graphic...

heart icons front

heart icons inside

I was surrounded by patterned papers and ribbons and lace...but this is what the card ended up looking like...sometimes, you can't predict where your creative muse will take you!

Do you see that awesome banner edge to the left of the sentiment? I knew that I would never be happy with the result I got using my scissors...so, I stuck the end of the rectangle into my square punch, and clipped off the triangle, and voila! A perfect banner edge...try it!

In the second group, I was given Halloween, and here is the result!

halloween front

halloween inside

Can you believe that those two stamps are $1 stamps? I love dollar stamps! I should start a blog featuring dollar stamps!!! Hey, maybe I will!!!

I also adore the spiderweb embossed background...that's using a Fiskars plate in my cuttlebug...isn't it great? I bought the plates and the embossing tool to use with it...but did not like the result I got...I'm sure that practice would have improved my technique...but I wasn't patient enough for that...

I'm looking forward to seeing what the other participants created...I love getting happy mail!

Thank you for looking!

Meredith


Card Kit Swap

I joined a swap over at Cardmaker swap board...for card kits...I've never done these before, so it should be interesting to see what I get back in the mail!

What is a card kit, you ask? Well, in this case, it is a coordinating set of papers, cardstock, stamped images and embellishments to make two cards.

For this swap, the host requested that our kits have a minimum of:

2 - 6x6 decorative papers
2 - standard A2 card bases
2 - 12" pieces ribbon or lace
2 - embellishments (brads, buttons, bling, chipboard, punches, diecuts, etc)
2 - stamped main images on at least 3x3 cardstock

And if you think about what you use to make your cards...that is more than enough to give you a great card!

Here is my kit that I put together for this swap:

Photobucket

I have four sheets of patterned paper in the back...they are actually double-sided, so the recipient can use whichever side they like best...or cut them up and use both!

Next are my stamped images...I couldn't decide which I liked best...so I did both!

The golden yellow pieces are my card bases...I loved the color, but thought the cardstock was just a tad flimsy...so I included ivory card liners for the inside (not pictured).

All the rest are the embellishments that I thought would go well with these colors...some brown embossed strips, several buttons (I'm almost embarrassed to admit how little of a dent this swap put in my stash...), some paper flowers, some fantastic crocheted lace and some eensy weensy little brads...seriously, they are the tiniest, cutest brads I've ever seen!

So, I'm including a bit more than the minimums...but that's less because I'm an overachiever, and more because I can't make up my mind!

So now, I know what a card kit is...and I look forward to playing with the ones I will receive in the swap!

Meredith

Kit ingredients: double sided patterned paper (heidi grace designs), gold and brown cardstock (coredinations), ivory cardstock (the paper company), owl stamp (craftsmart), sunflower stamp (no company listed-from hobby lobby), brads (Tim Holtz), ink (memento), embossing folder (cuttlebug), other - lace, buttons, paper flowers (unknown)

Sunday, August 1, 2010

Seeing Dots...

I'm playing along with The Stamps of Life design team challenge this week...the challenge is to use polka dots on your project!

I've been itching for time to sit down and use the new special releases, icons4us and youare2kind. You could probably make just about any card you wanted to with these two sets!

As I dove into my scrap pile I spotted my leftovers from an earlier project, the summer mantle display...and guess what? Polka dots! So after hunting down some appropriate inks, this is what I made!

TSOL polka dots

Hey, here's a hint for anyone who might not know this...if you are using clear stamps and are trying to use your dye inks and the ink is 'beading' up on the surface, so that the image is spotchy instead of smooth coverage...ink up your stamp with clear embossing ink first, then apply the dye ink color...and presto...smooth coverage!

Thanks for looking!

Meredith

Saturday, July 31, 2010

Signs of Peace

Ooh, I feel groovy! I was having fun looking around blogland yesterday, and came across mention of the Signs of Peace challenge over on Moxie Fab World...

Initially, I drew a blank, and was going to skip this one...but after looking at the great entries so far, they brought to mind a machine embroidery design from a hip company I love; Urban Threads, called Green Peace...

So I used the design and the challenge as inspiration for this card, and here is the result!

peace challenge

I took four types of patterned paper (from My Mind's Eye) and used my cricut (Wild Card) to cut leaf shapes then crumpled them and adhered them in the shape of the peace sign. I found the perfect background and sentiment stamps in my April 2010 Unity KOM.

I think it turned out pretty well...maybe if I try it again I'll use several different sizes of leaves...what do you think?

Thanks for looking!

Meredith